part 1/3
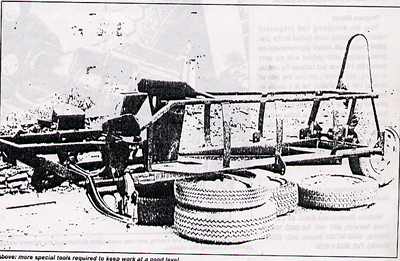
Rear Suspension The nearside end of the trailing arm pivot tube is left with its original rubber bush and bracket. The offside end will be bereft of its torsion bar, and must be fitted with a plastic collar which comes with the kit. The collar is then housed within the other reclaimed bracket (minus its rubber bush) taken from the offside of the donor vehicle; this is arrowed on the photograph. Any excess pivot tube protruding is later trimmed (lush with a hacksaw. When the pivot tube support brackets are installed on the chassis, two pre-drilled spacer bars are located as well. At this stage the wheel then needs to be fined in order to check that it's both central and vertically aligned. On account of variations in Renault suspensions and wheel sizes, the chassis is only pre-drilled with one location hole per bracket, thus allowing you toJower and lilt the supports until the wheel assumes the correct position. Then the initial bolts can be tightened, the additional holes drilled, and their bolts added - thereby fixing the wheel into its correct position and alignment. When arm movement is checked, you may find it necessary to trim away a small amount from the underside of the trailing arm to prevent it from fouling the chassis. However, this is all explained in the build-up manual, the latest copy of which is a great improvement on the original. The coil-over-shocker was fitted next using one of three alternative bolt positions on its upper attachment bracket. This seems lo work well .although more recent kits include an adjustable Spax shocker instead. Anyway, this completed the rear suspension and the chassis was now a sophisticated wheelbarrow.
Front Suspension Turning attention io the other end, upper and lower wishbones were fitted using the original Pivot bolts, albeit with nuts cleaned and coppered grease applied to all the moving parts, One of the central spacer tubes was worn, and a replacement was purchased from a Renault dealer. (£1.75) This was my first introduction to a torsion suspension system. As the lower wishbone moves up and down, a long bar starts to twist, thereby resisting the movement. The bar is attached to the lower wishbone on splines and extends horizontally backwards to a mounting bracket near the seat. Nothing is altered from the original Renault system and the new chassis is duly provided with rear mounting points in much the same manner as before. Later, the torsion bar is hidden by the sill of the glass fibre side panels. If the arrangement seems somewhat primative a friend explained that a similar twisting principle is involved in a coil spring: the bar is merely configured in a more compact form than the arrangement on the Renault. As regards front shock absorbers, Roy Webb strongly suggests that new Gordini replacements are purchased. This is one of the few .items you need to buy independently and my Renault dealer quoted me £74.98 - fitly percent more than the whole of the donor car! I got off the floor, recovered my breath, bit the bullet and bought them...............